Injector
Injector Water Cock (November 2015 - December 2015)
Whilst the tapering attachment is set up to match the taper reamer it makes sense to make the injector water cock...
This component was a larger scale to the drain cocks making manufacture slightly easier. Again all parts were machined from bar stock, with the body being LG2 (gunmetal) and the spindle being PB102. The outer faces and tapered hole of the hexagonal body was machined on the 4th axis and then the internal holes and threads were completed on the lathe.
The spindle was started on the lathe, where the taper was initially cut (using the same taper setting setting that the lathe was set at from making the taper reamer). Experience of making the water gauge showed that grinding the taper into the body before setting out any of the other features is the optimum way forward as until the grinding operation is complete the finished dimensions are not known.
Once the spindle was ground into the body, the assembly was mounted in the 4th axis and the square drive machined. The washer was then made and broached with an internal square hole and fitted to the assembly. Having now completed a number of these tiny washers, the best method found was to turn the outers surfaces and part off, then superglue the washer to a hollow arbour. From practice, it was found that all parts need to be really cleaned well using lighter fluid (or the like) and then the glued joint left for a good 10mins to cure before broaching. Even then great care is needed to prevent the square file jambing in the washer, if the file did jamb it was found the glue bond would break. Once the broaching is complete a little heat removes the washer easily from the arbour.
Once the washer was fitted to the assembly, the retaining nut thread dimensions can taken and the thread subsequently machined.
The upper end of the spindle of the water cock is profiled with a knuckle joint to take drive from a vertical spindle. This feature was completed by again mounting the spindle in the 4th axis and using the mill to cut a semicircular curve through the part and essentially parting the spindle from the bar stock. It was found the part needed supporting (by fingers!) as the cutter reached the maximum depth and then finishing was completed using small files and emery paper.
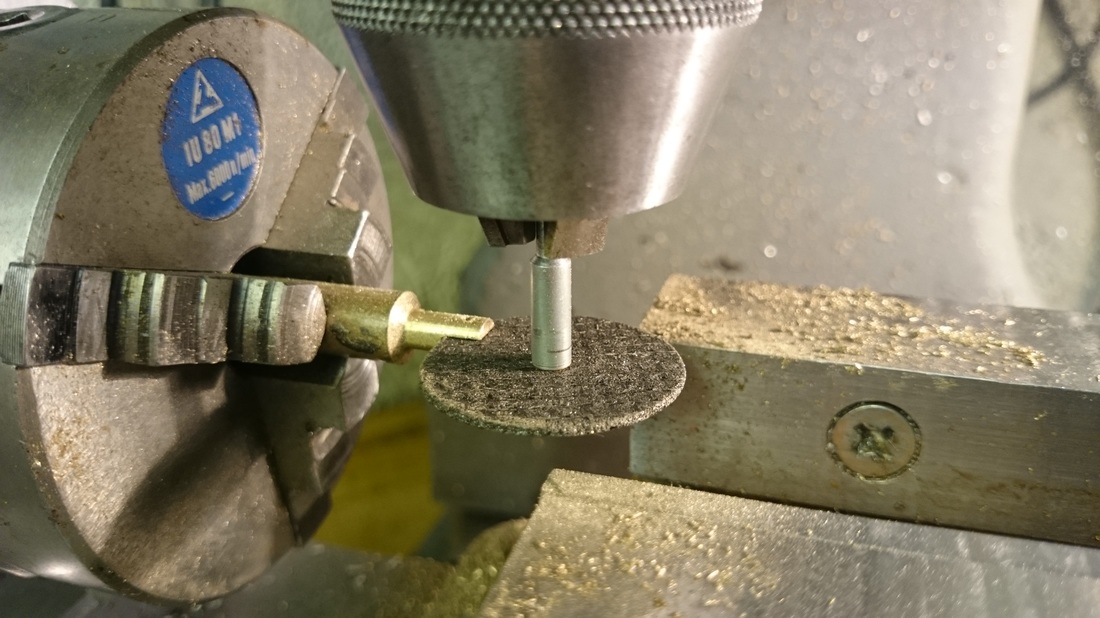
The upper knuckle was also completed in the similar manner, However, the groove in the knuckle was completed using a Dremel disc in a slitting saw arbour and the rounded end completed using the mill.
Injector Water Cock (November 2015 - December 2015)
Whilst the tapering attachment is set up to match the taper reamer it makes sense to make the injector water cock...
This component was a larger scale to the drain cocks making manufacture slightly easier. Again all parts were machined from bar stock, with the body being LG2 (gunmetal) and the spindle being PB102. The outer faces and tapered hole of the hexagonal body was machined on the 4th axis and then the internal holes and threads were completed on the lathe.
The spindle was started on the lathe, where the taper was initially cut (using the same taper setting setting that the lathe was set at from making the taper reamer). Experience of making the water gauge showed that grinding the taper into the body before setting out any of the other features is the optimum way forward as until the grinding operation is complete the finished dimensions are not known.
Once the spindle was ground into the body, the assembly was mounted in the 4th axis and the square drive machined. The washer was then made and broached with an internal square hole and fitted to the assembly. Having now completed a number of these tiny washers, the best method found was to turn the outers surfaces and part off, then superglue the washer to a hollow arbour. From practice, it was found that all parts need to be really cleaned well using lighter fluid (or the like) and then the glued joint left for a good 10mins to cure before broaching. Even then great care is needed to prevent the square file jambing in the washer, if the file did jamb it was found the glue bond would break. Once the broaching is complete a little heat removes the washer easily from the arbour.
Once the washer was fitted to the assembly, the retaining nut thread dimensions can taken and the thread subsequently machined.
The upper end of the spindle of the water cock is profiled with a knuckle joint to take drive from a vertical spindle. This feature was completed by again mounting the spindle in the 4th axis and using the mill to cut a semicircular curve through the part and essentially parting the spindle from the bar stock. It was found the part needed supporting (by fingers!) as the cutter reached the maximum depth and then finishing was completed using small files and emery paper.
The upper knuckle was also completed in the similar manner, However, the groove in the knuckle was completed using a Dremel disc in a slitting saw arbour and the rounded end completed using the mill.