
|
Introduction
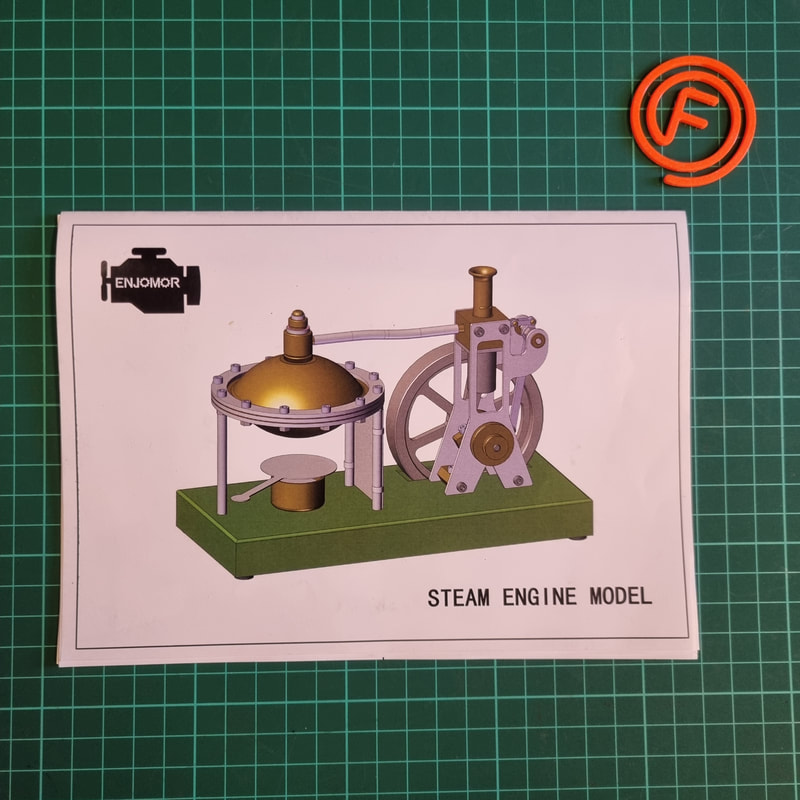
Stirling Kit offered a collaboration where I could select a product from their website to experience and promote their service through, building, testing and reviewing. I was naturally delighted with this offer and selected a product that suited the theme of this blog site and my Instagram page. The product I selected was the Hero Engine, I decided on this one as it is a DIY build kit that requires assembly and results in a live steam engine that can be enjoyed on the bench and demonstrates the working principals of a steam engine. |
|
|
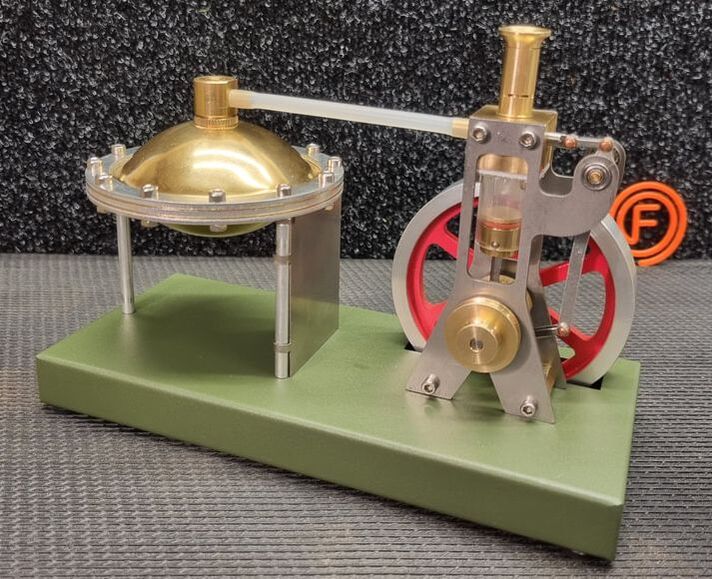
The Hero Engine
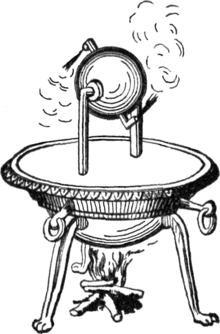
The name of the kit suggests a linkage or homage to the Aeolipile, (also known as a Hero's engine), which is a simple, bladeless radial steam turbine with a similar boil shape to this model. The brass boiler of this kit provides this visual linkage, and I think it makes the kit quite special! From there the kit delivers its steam driven rotational output in a unique manner using materials such as glass and rubber and a design based on a traditional piston valve single acting steam engine. This creates an exciting and fun way of way of demonstrating how the energy stored in a liquid alcohol fuel can be converted into motion and useful work. The design of this Hero Engine is not something that I have seen before. The key exciting features as I see them are: |
|
|
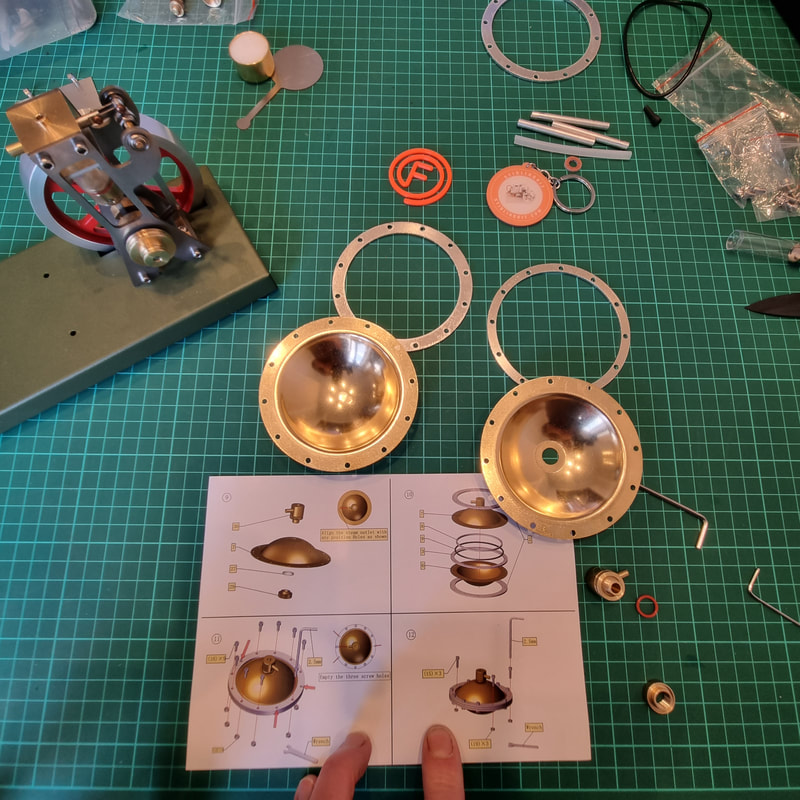
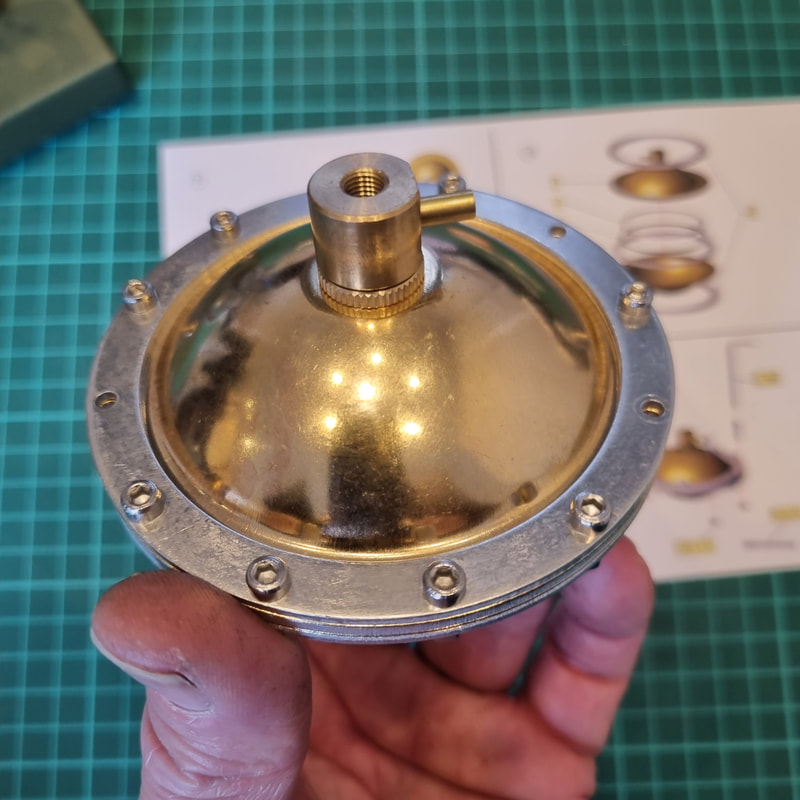
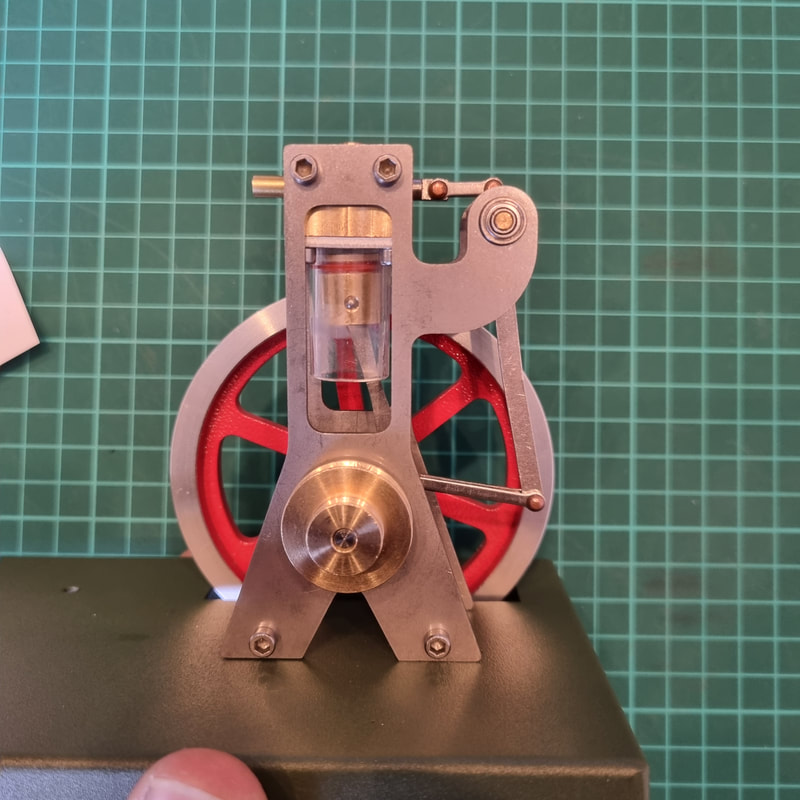
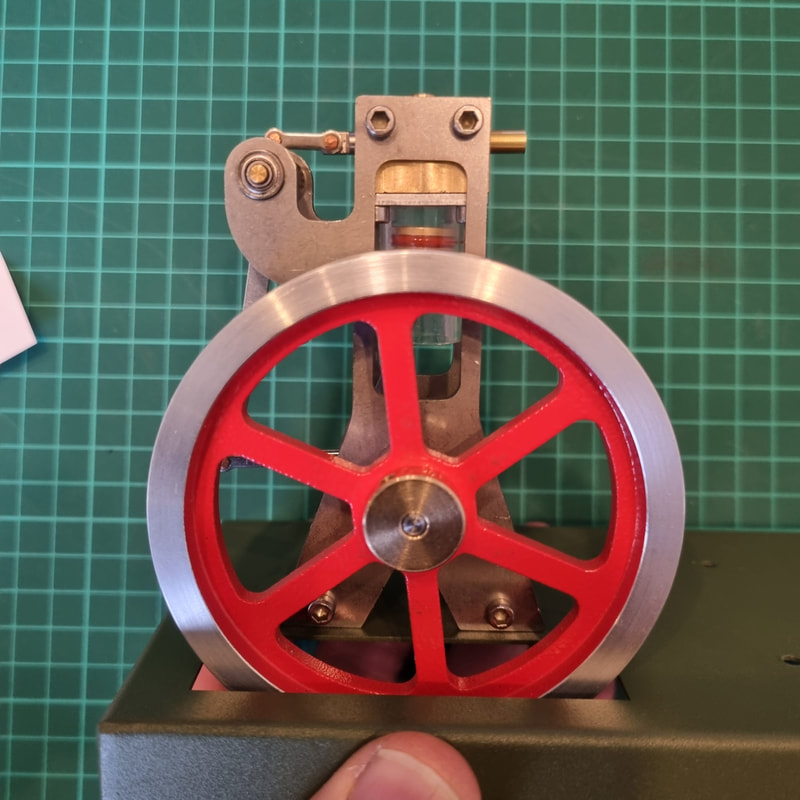
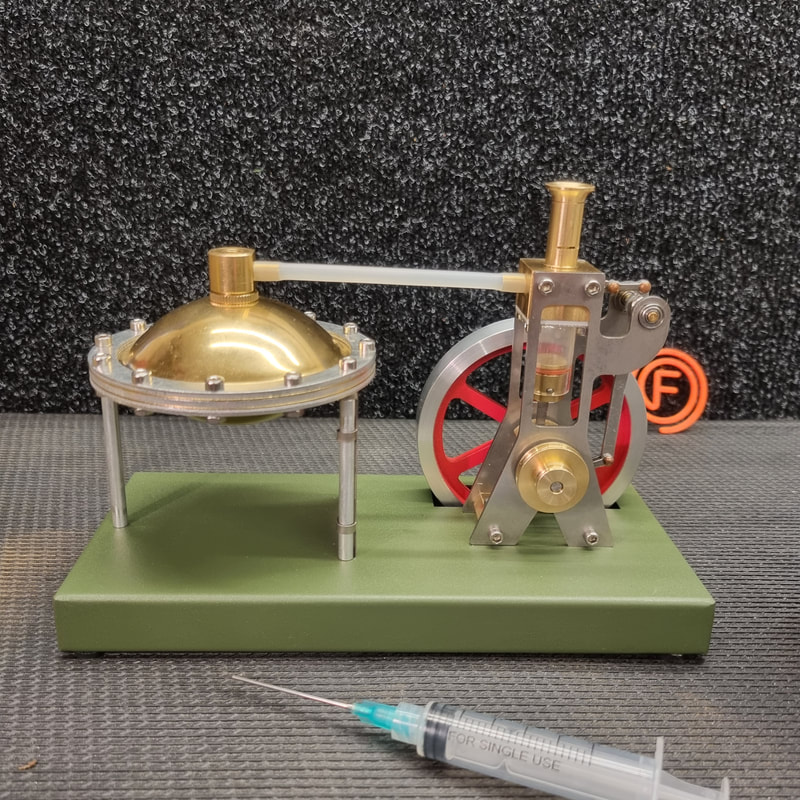
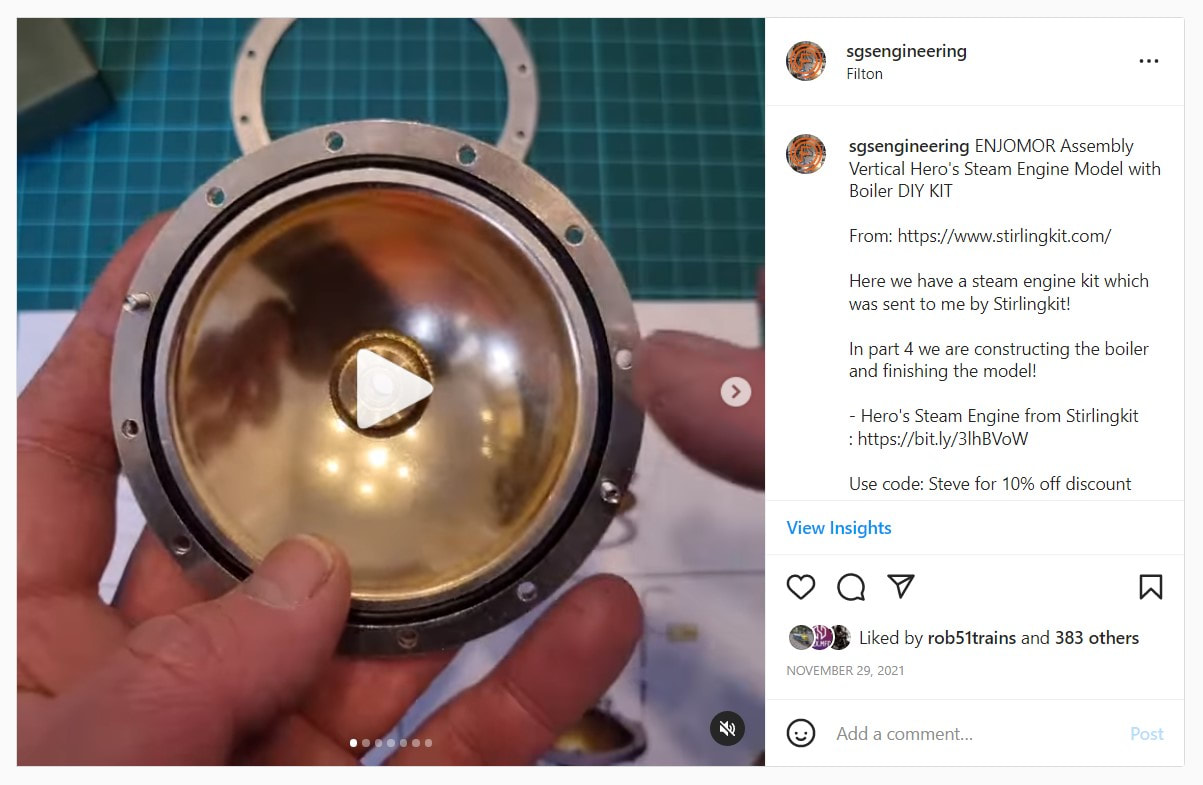
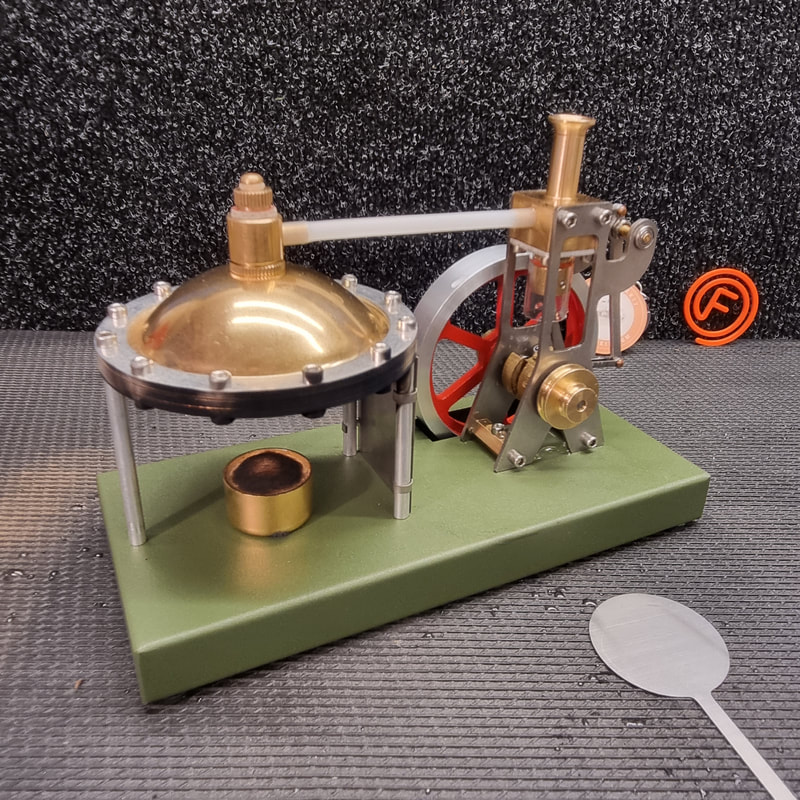
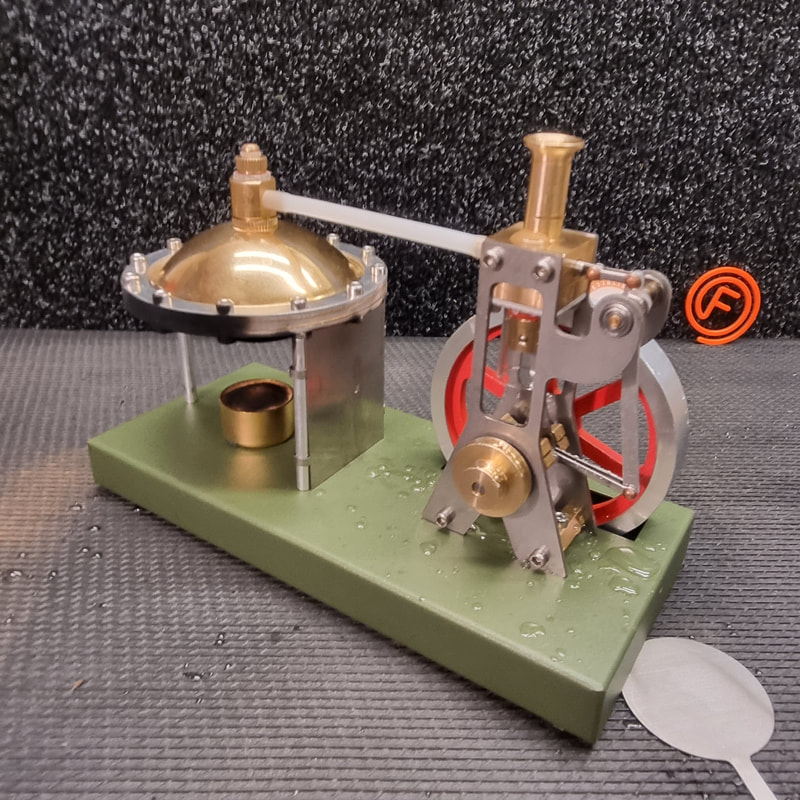
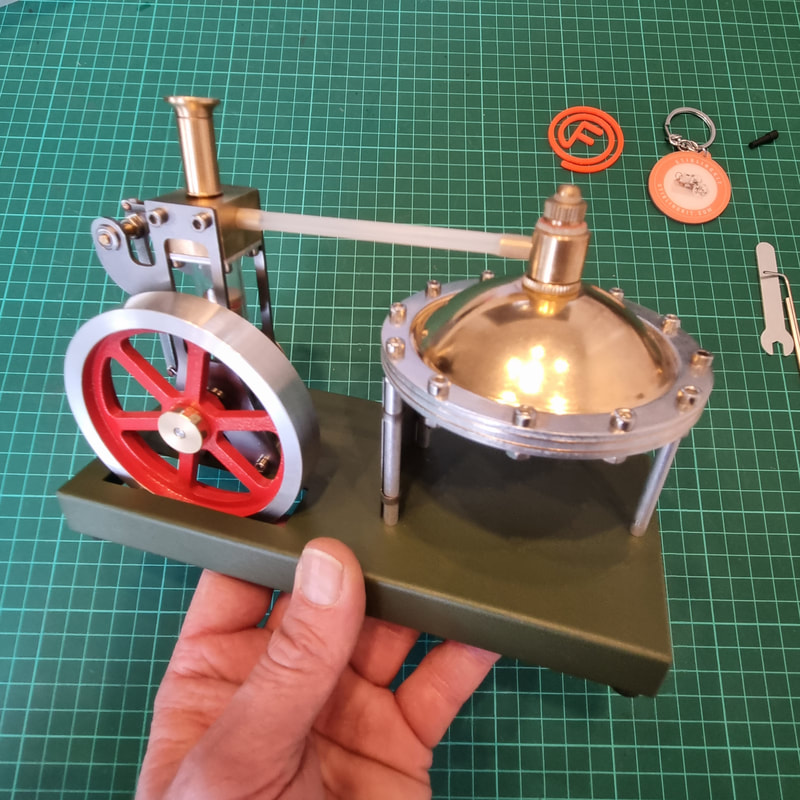
Boiler – The pressed brass boiler is constructed from an upper and lower shell that sandwiches a rubber o’ring. The domed profile of the shells enables the boiler to withstand the working pressure without deforming and the ring of fasteners holding the two shells together provides a great visual look.
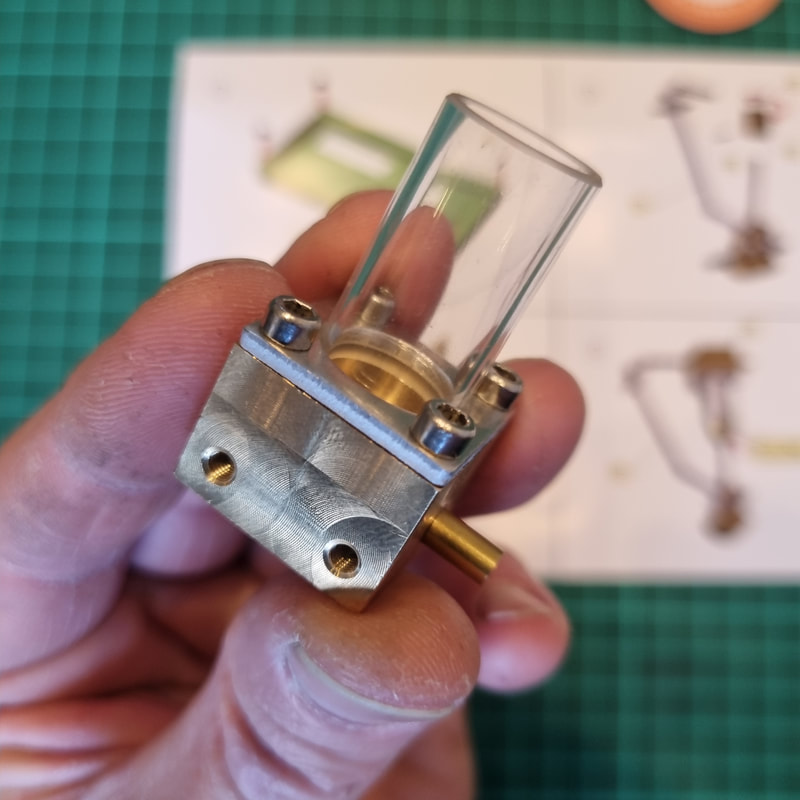
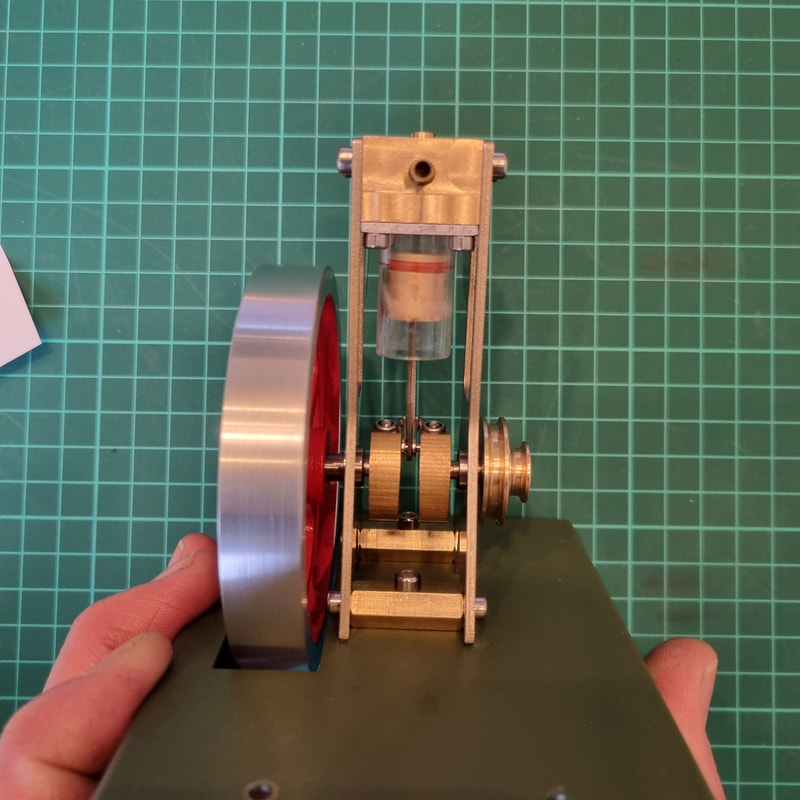
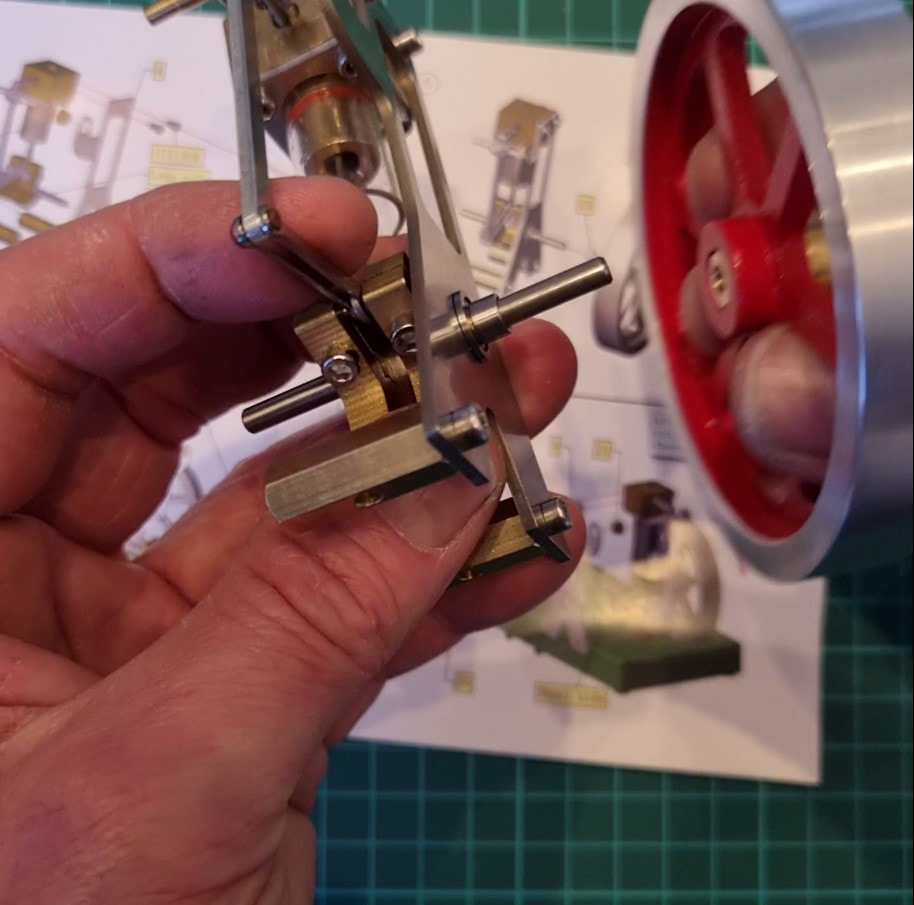
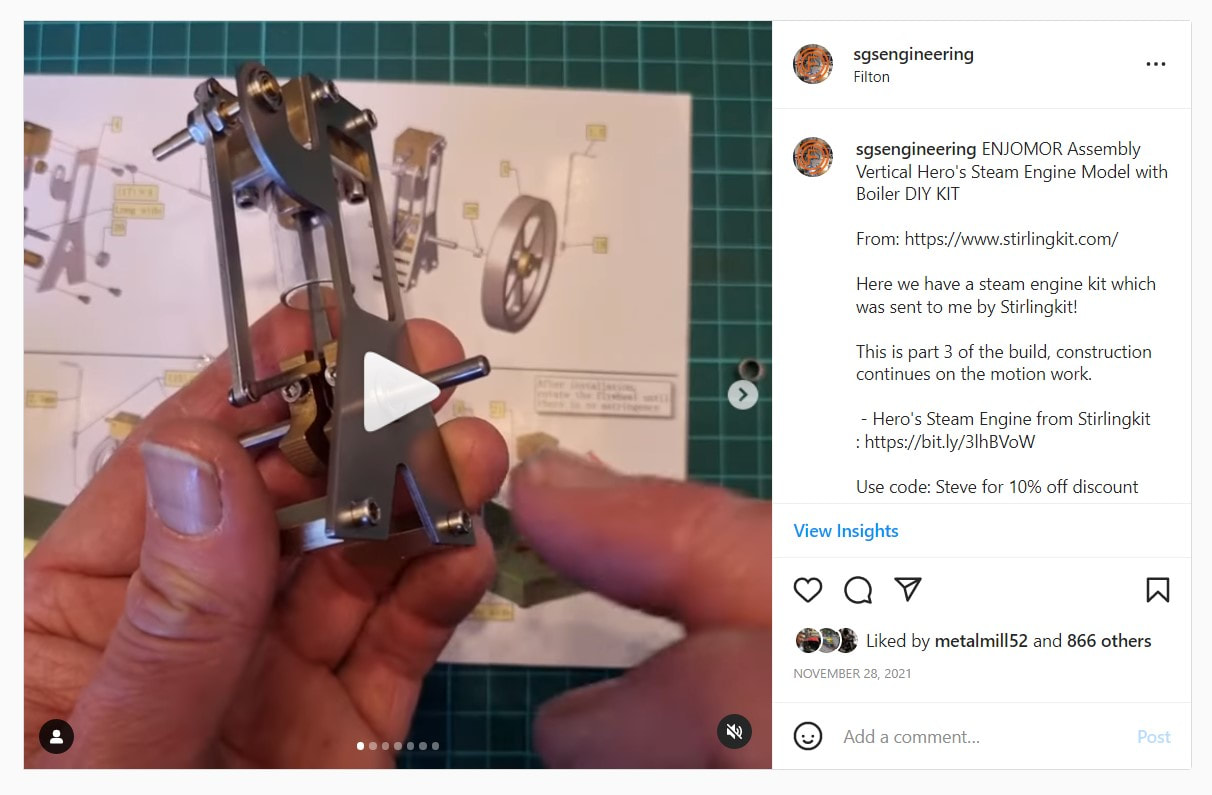
Steam Cylinder – A glass tube is used as the steam cylinder and houses the piston, sealed with a red silicone o’ring. This displays to the operator exactly what is happening and where the motion is during its cycle. This is a stand out feature of this engine which generates a striking visual impact. Safety - This kit and offers several safety features making it suitable for use by younger or less experienced operators. Principally it operates at a very low steam pressure, which practically eliminates the dangers of working with high energy steam, however still offers the user the experience and demands of managing a steam boiler. To do this the kit includes a safety valve, to release steam over the working pressure. This features demands the operator’s engagement whilst in steam to limit wasted steam out of the safety valve whilst using the steam available to produce useful work from the engine. Splash-Proof Exhaust – This is a great feature! I have a lot of experience with other small scale model steam engines which generally direct the steam exhaust vertically out of the chimney. It is commonly experienced that during the initial stages of running, the steam will condense in the cold cylinder and then be ejected out of the exhaust as splashes of scalding water. The design incorporated in this Hero engine includes a baffle in exhaust preventing the splashes of scalding water by directing them back down over the steam chest. In addition, the system allows the exhaust gas to escape vertically providing that quintessential steam chimney look! Piston Valve – This kit has a single acting cylinder, where the steam only acts on the top of the piston. The kinetic energy stored in the fly wheel is then used to drive the crank through the exhaust stroke to repeat the cycle. It is great to see that on this kit there is a piston valve as opposed to a cheaper oscillating cylinder that is normally seen on models of this scale. The piston valve moves horizontally in and out of the steam chest, covering and uncovering the steam ports to direct the steam into the cylinder and the exhaust out of the chimney. Valve Motion Levers – The piston valve is driven through a set of linkages from the shared crank pin (big end). This is a great piece of design, which minimises the components and provides the operator with clear and exciting visualisation of how the crank rotation is translated into a linear motion, which is phased correctly to deliver the necessary valve events. Materials – The kit is supplied as pressed sheet metal, machined components and hardware. The pressings are free from burrs, well finished and accurate. The machined parts have a high quality surface finish and fit excellently together. The hardware is well polished and adds great detail to the model. Bearings – The key rotational pivot points are made with sealed roller bearings, which is a great feature compared with other models on the market. The bearings fit well in the pressed metal parts and require what feels like a ‘firm resistance’ to insertion that subsequently retains the bearing in position. The valve linkages are made with copper rivets that provide the bearing surfaces, these are not as high quality as the main bearings but are adequate to provide many hours of operation. Output Pulley – The model includes a double output pulley allowing the operator to take drive via a round profiled belt. This a great feature which will inspire the inclusion of this model into a wider assembly of models. Fuel source – A brass cup filled with cotton wool contains the liquid alcohol fuel and doubles as the burner. An excellent hidden feature of this part is a magnet in the cup’s base. This holds the burner in place whilst in operation and was a delight to discover. To extinguish to flame the burner is complete with cap that can be easily and safely placed over the cup to immediately stop the burn. |
|
|
Assembly of the kit
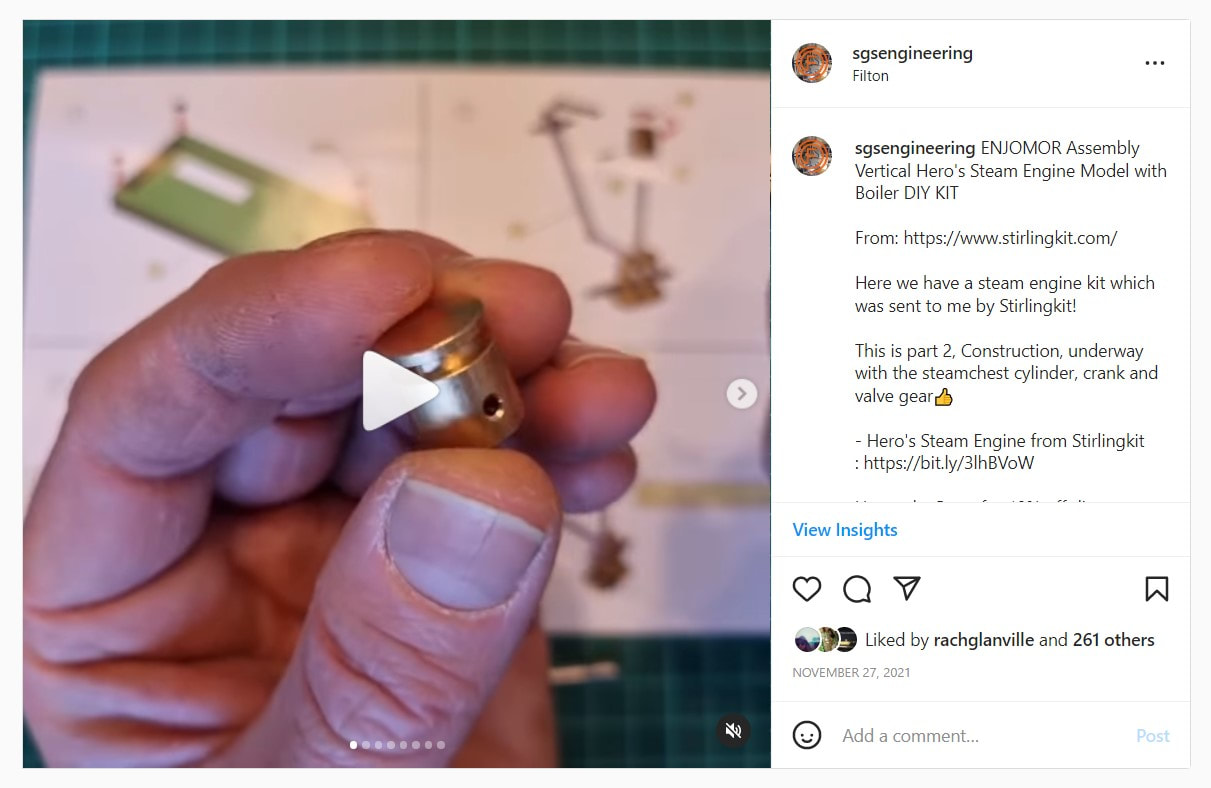
The kit requires 2-3hours of assembly and is guided with a clear and well-staged set of colour printed instructions. I found that all the parts fitted well together and required negligible intervention for correct operation. Throughout the assembly the builder needs to ensure the parts are correctly aligned and securely fastened without over tightening the small screws. When assembling the motion, care is needed to ensure that it runs freely and correctly. I did have to slightly ‘bend’ or adjust the valve linkage as out of the box the piston valve hit the end of its travel. This was easily corrected but might cause issues for the lesser experienced builder. I also found that the crank pin slipped slightly between the crank webs. This required realignment, but once set offer no further issue. I covered the full assembly in a series of Instagram videos, which can be viewed at the following links: |
|

|
Operating the Model
I filled the boiler with hot tap water previously boiled in a kettle. Adding hot water reduces the start-up time and gets the engine into steam sooner. Having previously boiled the water also helps to reduced the scaling that can occur in the model. I used a syringe (not included in the kit) to inject the water through the safety valve hole into the boiler. This enabled a known volume of water to be added and prevented the boiler from being over filled. If a syringe is not available, care should be taken to not over fill the boiler! I lubricated the crank pin and valve linkages with a light oil before operation, this is not included in the kit. Whilst not essential is good practice on a steam engine. I used lighter fuel as the source of energy, which was possibility a mistake as it left a soot over the base of the boiler. A cleaner alcohol fuel would be better, as is requested in the instructions. I positioned the engine in a well ventilated space, clear of flammable items to ensure the safe operation. |
|
Start Up
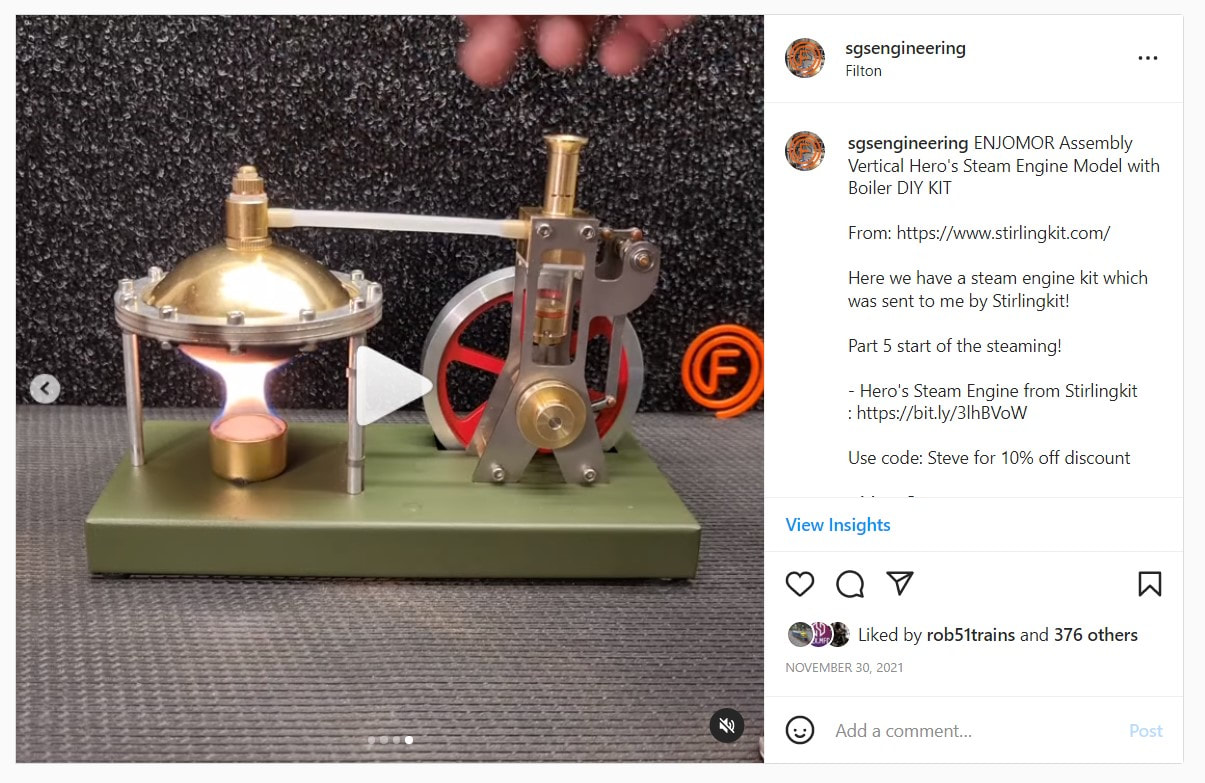
Once the flame was lit, it only took a few minutes for the model to show signs of life. Initially a fizzing sound was heard from the steam building in the boiler and escaping though the exhaust. I manually moved the motion through its cycle to a position where the steam was not routed to atmosphere and allowed to build in pressure. When the safety valve lifted, indicating working pressure was reached, and the model was ready to run.
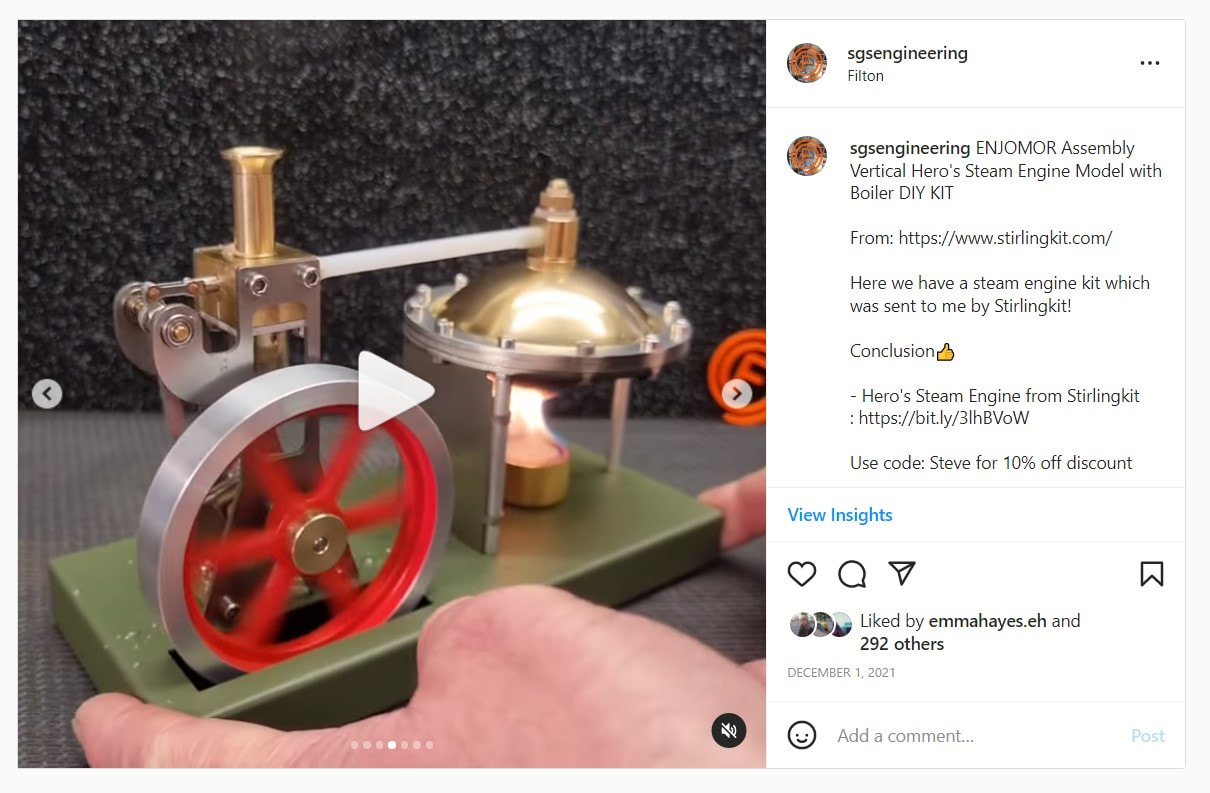
A small flick of the flywheel brought the model flashing into the life and straight to a high rotational speed. The splash-proof exhaust operated well and prevented any condensate from flying upwards and the motion oscillated correctly to result in precise valve timings. After the initial burst of activity the steam engine consumed the excess steam in the boiler and reduced the working pressure to that of an equilibrium with the steam being produced. At this point the engine settled down into a normal/working condition which was then maintained for a few minutes, sufficient to admire the model and take useful work from the pulley to drive other things!
I found the fuel ran out before the water in the boiler, which again is a great indirect safety feature! At that point the operator needs to let the model cool before either topping up the boiler or refuelling.
Clean Up
Once cool, I removed the safety valve and drained the remaining water from the boiler and generally cleaned the engine with paper towel and light oil and the model was ready for storage!
Conclusion
I was very impressed with the quality of this kit, the parts fitted well together which made for an interesting and rewarding build experience. No special tools were required and the instructions were intuitive to follow. Once constructed the model was simple to fuel and water, and jumped into life as easily! The operation required the natural precautions associated with a steam engines and the respect for the heat and pressures involved. Overall the model presented a safe and fun user experience and provides an excellent educational opportunity to learn and understand the key features of a steam engine.
If you would like to experience this or a similar kit yourself then please head over to the Stirling Kit Website and use the code ‘Steve’ for a 10% discount.
Any questions or comments on this building experience, please drop me a line, details are in the contacts tab.
Once the flame was lit, it only took a few minutes for the model to show signs of life. Initially a fizzing sound was heard from the steam building in the boiler and escaping though the exhaust. I manually moved the motion through its cycle to a position where the steam was not routed to atmosphere and allowed to build in pressure. When the safety valve lifted, indicating working pressure was reached, and the model was ready to run.
A small flick of the flywheel brought the model flashing into the life and straight to a high rotational speed. The splash-proof exhaust operated well and prevented any condensate from flying upwards and the motion oscillated correctly to result in precise valve timings. After the initial burst of activity the steam engine consumed the excess steam in the boiler and reduced the working pressure to that of an equilibrium with the steam being produced. At this point the engine settled down into a normal/working condition which was then maintained for a few minutes, sufficient to admire the model and take useful work from the pulley to drive other things!
I found the fuel ran out before the water in the boiler, which again is a great indirect safety feature! At that point the operator needs to let the model cool before either topping up the boiler or refuelling.
Clean Up
Once cool, I removed the safety valve and drained the remaining water from the boiler and generally cleaned the engine with paper towel and light oil and the model was ready for storage!
Conclusion
I was very impressed with the quality of this kit, the parts fitted well together which made for an interesting and rewarding build experience. No special tools were required and the instructions were intuitive to follow. Once constructed the model was simple to fuel and water, and jumped into life as easily! The operation required the natural precautions associated with a steam engines and the respect for the heat and pressures involved. Overall the model presented a safe and fun user experience and provides an excellent educational opportunity to learn and understand the key features of a steam engine.
If you would like to experience this or a similar kit yourself then please head over to the Stirling Kit Website and use the code ‘Steve’ for a 10% discount.
Any questions or comments on this building experience, please drop me a line, details are in the contacts tab.
ENJOMOR Assembly Vertical Hero's Steam Engine Model with Boiler - DIY KIT
Features:
DIY Fun: The steam engine adopts the form of assembly kit, nearly 40 kinds of parts, you will start a challenge project to build a new steam engine yourself, clear graphical instructions, wonderful assembly process, and explore the internal structure and principle of the steam engine.
Retro Steam Engine: the vertical structure of the steam engine, the cylinder and the air distribution mechanism are easy to observe, the transparent cylinder design, the piston movement is unobstructed. The large-size flywheel design enables faster start-up and smoother operation. The simulated jet sound makes people obsessed. It has DIY modification space and output power, and supports the installation of LED lights and other loads.
Safety Design: spherical boiler, the steam pressure is evenly released. The boiler is equipped with a mini safety valve, a splash-proof exhaust tube, an all-brass alcohol lamp, and a fire-extinguishing gland to ensure safe use
Superb Manufacturing Process: The boiler is made of all metal materials, which is safe and strong, and has a short start-up time. The retro appearance evokes the feelings of the steam age, and the first-class processing technology brings excellent performance and high-end mechanical model experience. It is a handicraft with both texture and beauty
Wide Range of Applications and Gift Idea: This product is suitable as teaching aids and learning tools, doing scientific and technological experiments, and contributing to popular science knowledge. It can also be used as a cool desktop decoration crafts to play with. At the same time, it is suitable as a great gift for birthdays, Christmas and other holidays to steam model players and technology enthusiasts.
Instructions: Place the model on the desktop, unscrew the boiler valve and add water, light the alcohol lamp, heat the boiler, heat the boiler water to the boiling point, turn the steam engine flywheel by hand to help start, and the machine can run
Note: The water in the boiler can only be added up to 2/3 of the capacity. The machine is forbidden to dry without water, and it is forbidden to touch the heated part of the machine to prevent scalding. Children should use it under the supervision of an adult. Applicable age: 14 years old and up
Specifications:
Material: Metal
Product Dimensions:20 x 9 x14cm
